
The Only Hermes Agent Setup You Need For Your Remote Machine
Set up your VPS, connect your devices safely, integrate your IDE, optimize your repository, and control the Hermes Agent from your phone.

Open-source AI agents like OpenClaw and the Hermes Agent are no longer frameworks that only the geeky technical guys can set up.
While software engineers and developers have a competitive advantage because they are familiar with the CLI, non-technical people can also achieve the same outcome by using Claude or other agents.
Yes, non-technical people may take more time to debug because they rely on Claude’s reasoning efforts to continue, but they will have the AI agent running anyway.
Therefore, this remote setup is not focused on following commands and talking with the machine, is aimed at making the best decisions, so you can start building smoothly, safely, and faster instead of reading multiple articles and posts on X.
In the end, regardless if you are a developer or not, what you want is an agent ready to start building, and that’s what I’m about to show you.
Choose a Good VPS Provider
If you want to install the Hermes Agent on your local machine, you can jump this section, but keep reading if you’re still looking for the right VPS provider.
There are several cheap VPS providers like Hetzner, Hostinger, and Contabo.
It’s been more than four years since I started using Contabo’s German VPS provider, and I have never had any issues with it. I’m not saying it is better than others, but it has worked well so far, without interruptions or security issues.
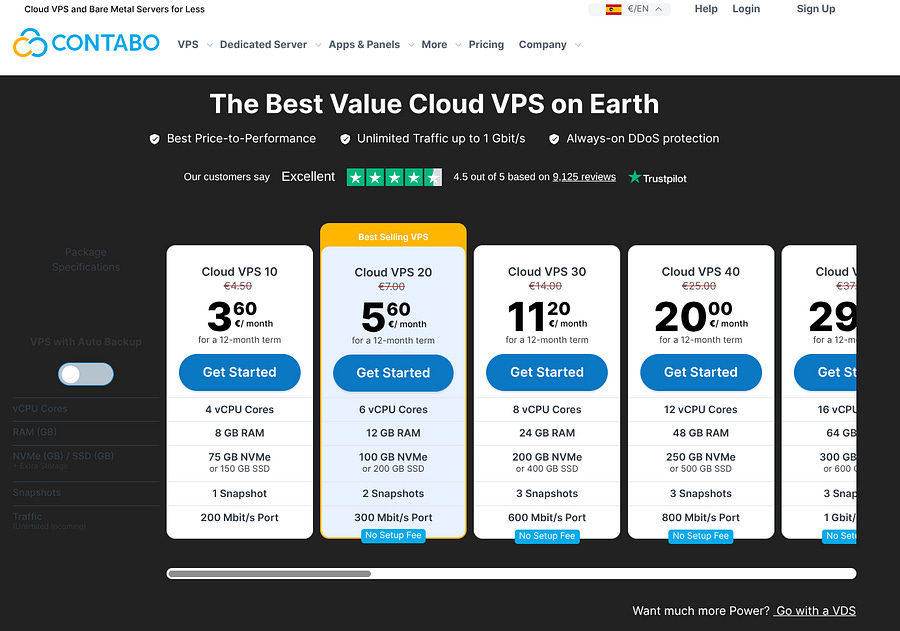
You can basically run your agent for only 3.60€/month, but if you need more performance, I recommend using a VDS (Virtual Dedicated Server). This way, your machine’s computational resources are not shared with other servers, and you gain more stability and speed.
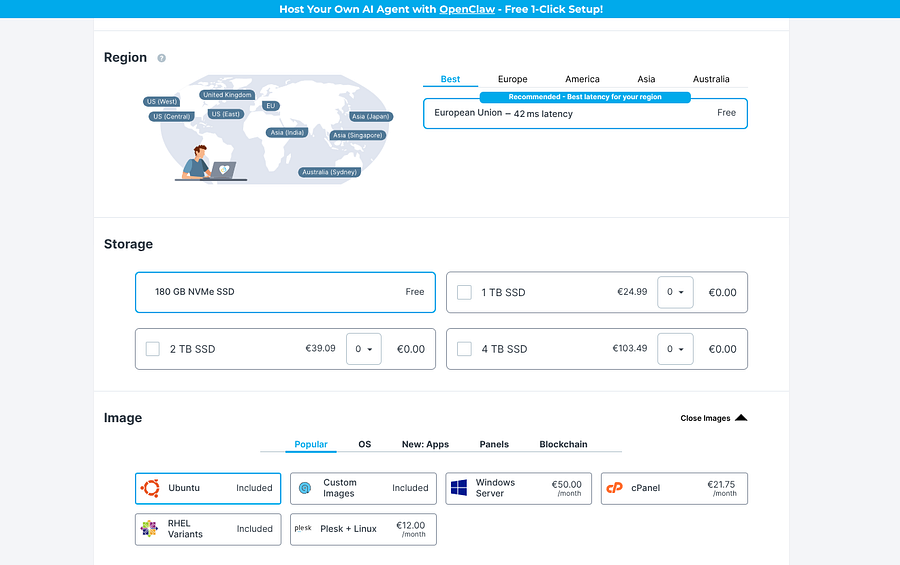
If you decide to pick Contabo, the installation steps are straightforward, but for the disk image, I recommend using Ubuntu if it’s your first time using Linux.
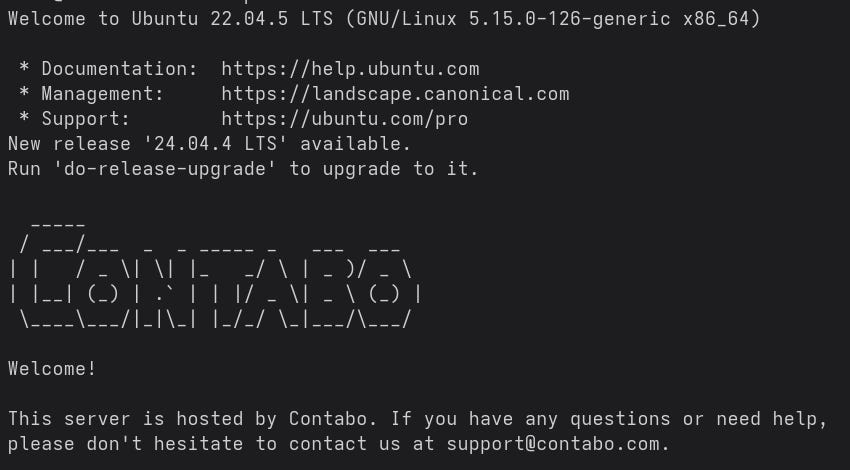
Once installed, you should be able to access your remote machine by simply running this in your terminal:
ssh root@<server_host>If you didn’t add SSH keys, it will ask for the password, and you will get instant access to the VPS.
Now, there are two options here. You can either use root as your default user or create a new one only for Hermes.
I took the second approach because I have many other projects on my VPS besides this AI agent, and I wanted to separate it from the other files and folders.
This is how you create a new user:
adduser myhermesAnd you can set up a password for it:
passwd myhermesThere’s no need to install Hermes yet, let’s continue to the security section.
Connect All Your Devices to Tailscale
Tailscale was founded in 2019 by three Google engineers who decided to simplify secure, peer-to-peer Virtual Private Networks (VPNs) based on the WireGuard protocol.
This protocol lets your devices and services connect securely over the internet as if they were on the same private network. In other words, you can have multiple devices associated with a single network that you control.
This can ensure that no one can access your remote machine, even if they have your password and SSH keys. Only the devices inside the private network can communicate with each other.
In this section, I show you how you can do that.
There are at least three devices that should be added to your network: your VPS, your personal computer, and your smartphone.
Why the smartphone, you ask? That’s because we are going to use it to interact with Hermes as well, using Termius in the next section.
You can start by creating an account on Tailscale’s website, and you’ll be asked to add your first device.
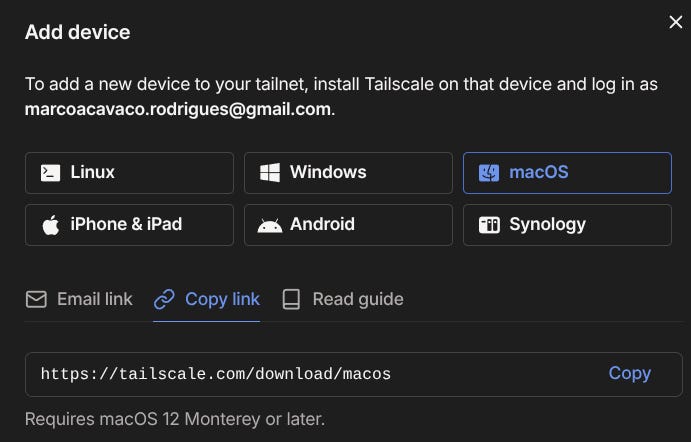
Depending on the operating system (OS), you’ll see multiple ways of installing it, but they are all straightforward.
Once your personal computer is added, you can do the same for your smartphone. Choose Android or iPhone and scan the QR code. You can also just download the app and access it with the same email.
Two machines added, now it’s time for the remote one. Since it’s a Linux distro, you need to run this in your VPS (in root):
curl -fsSL https://tailscale.com/install.sh | shAnd start the client:
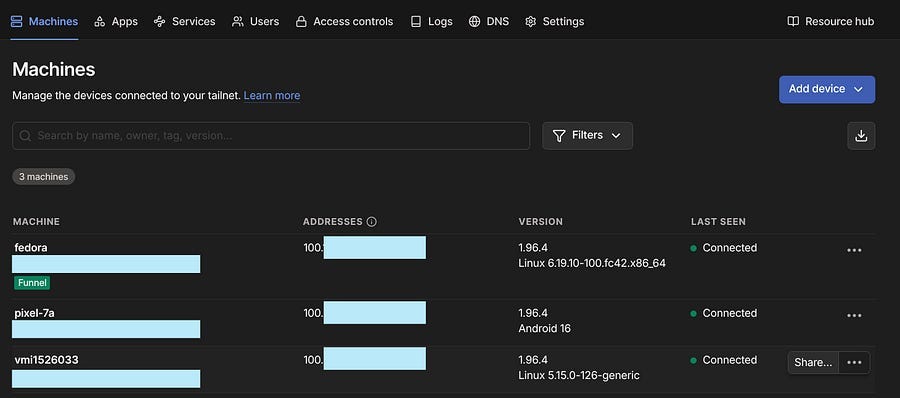
sudo tailscale upYou will get a URL as output to authenticate to your Tailscale network. All your devices should be visible on Tailscale’s console:
Now we need to ensure that the only way to SSH into your VPS is through Tailscale. For that, we need UFW (Uncomplicated Firewall), which is a firewall management tool for Ubuntu.
# 1. Make sure UFW is installed (it comes with Ubuntu but just in case)
sudo apt update && sudo apt install ufw -y

# 2. Set the default policies: block everything incoming, allow outgoing
sudo ufw default deny incoming
sudo ufw default allow outgoing

# 3. Allow SSH ONLY from Tailscale’s IP range
sudo ufw allow in on tailscale0 to any port 22 proto tcp

# 4. (Optional) If you want to allow any traffic between your Tailscale devices
#    This is handy if you later run services you only want accessible privately
sudo ufw allow in on tailscale0

# 5. Enable the firewall
sudo ufw enable

# 6. Check your rules
sudo ufw status verbose
That’s it, now all traffic only goes through the Tailscale network. In case you want to use Cloudflare, there’s a list of IP ranges that need to be allowed. You can find the list here.
# Allow HTTPS (port 443) from Cloudflare IPv4 ranges
sudo ufw allow from 173.245.48.0/20 to any port 443 proto tcp
sudo ufw allow from 103.21.244.0/22 to any port 443 proto tcp
sudo ufw allow from 103.22.200.0/22 to any port 443 proto tcp
sudo ufw allow from 103.31.4.0/22 to any port 443 proto tcp
sudo ufw allow from 141.101.64.0/18 to any port 443 proto tcp
sudo ufw allow from 108.162.192.0/18 to any port 443 proto tcp
sudo ufw allow from 190.93.240.0/20 to any port 443 proto tcp
sudo ufw allow from 188.114.96.0/20 to any port 443 proto tcp
sudo ufw allow from 197.234.240.0/22 to any port 443 proto tcp
sudo ufw allow from 198.41.128.0/17 to any port 443 proto tcp
sudo ufw allow from 162.158.0.0/15 to any port 443 proto tcp
sudo ufw allow from 104.16.0.0/13 to any port 443 proto tcp
sudo ufw allow from 104.24.0.0/14 to any port 443 proto tcp
sudo ufw allow from 172.64.0.0/13 to any port 443 proto tcp
sudo ufw allow from 131.0.72.0/22 to any port 443 proto tcp
Now that you have all three devices connected to Tailscale, we need to ensure that they can all communicate with the Hermes instance. Let’s start with the smartphone.
Control Hermes From Your Phone with Termius
There are two good solutions to access your VPS machine from your smartphone: Termius and Termux. The latter is free and open-source, and Termius offers paid plans, but for connecting your VPS, you can stick with the free tier.
I prefer Termius because it has a clean UI and quick server connections. All you need is to install the app and add a new host.
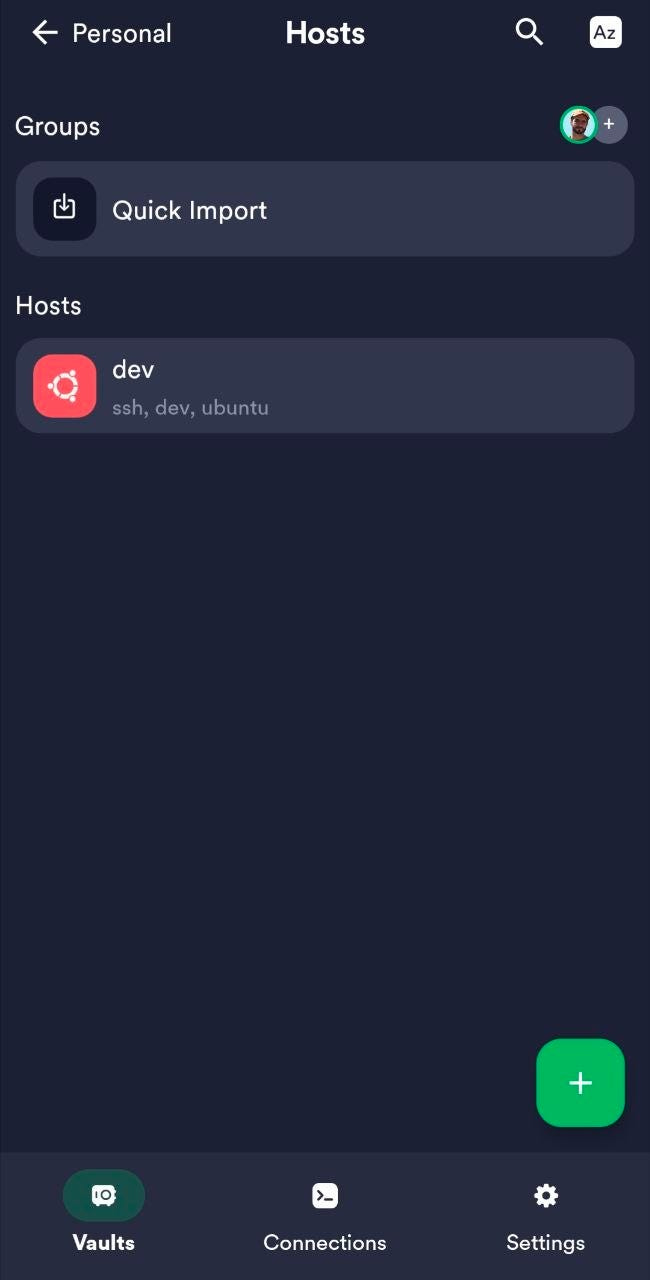
For the new host, don’t use the IP that is visible in your VPS provider. Instead, you need to add Tailscale’s IP (check the Machines page on your console). It should be something like this: 100.xx.xxx.xx. Also, add the username (root or the second user) and the password if you’re using one.
All that’s it, you should now be connected to your VPS on your phone. Note that this won’t work if you don’t have your smartphone connected to Tailscale’s network yet.
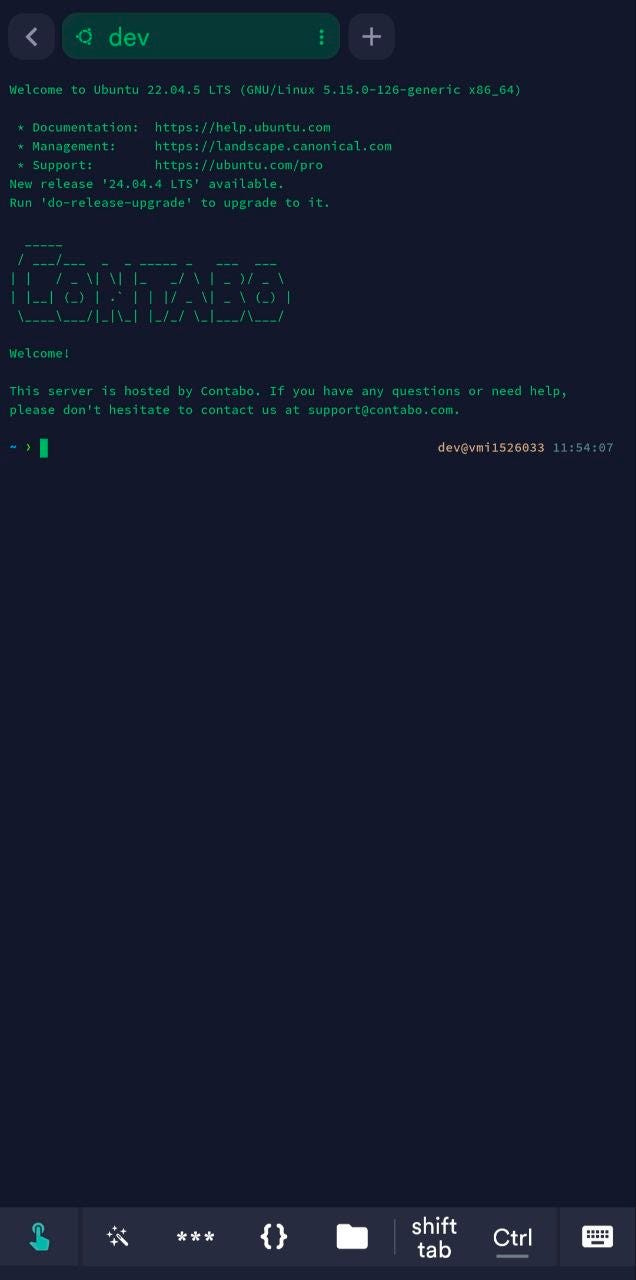
But why do you need Termius if you can control your agent from Telegram, WhatsApp, and other chat apps? Well, that’s because sometimes certain prompts can shut down Telegram’s (or any other app’s) gateway, and you may not be able to give instructions to your agent from your smartphone. This is an annoying issue that doesn’t happen often, but if it does, you can restart the gateway from your terminal using the Hermes TUI (Terminal User Interface).
We haven’t installed Hermes yet, but to launch the TUI, you just need to launch the Hermes Agent with Termius and tell it to restart the gateways. Issue fixed!
Besides that, you can also have direct access to your repo from your smartphone if you need to make further adjustments while having a lunch break.
Now let’s see how to access the VPS using your IDE.
Connect Your VPS to Your IDE
We have seen before that one single command connects your personal machine to your VPS. But you probably want to have easy access to all your folders and projects on the remote machine, as well as being able to tweak skills, scripts, and configurations without using Linux commands.
That’s why using an IDE is useful. Ideally, you want to have an auxiliary agent to tweak the code and the files that the agent creates. So the best is to have an AI-powered IDE like Cursor or VS Code with Claude or Codex extension.
There is a command line that directly opens the IDE with your remote machine:
# Launch with Cursor IDE
cursor --remote ssh-remote+root@100.xx.xxx.xx /root

# Launch with VS Code IDE
code --remote ssh-remote+root@100.xx.xxx.xx /root
Above you see the example for root, but you can also connect to another user. Remember, you need to use the Tailscale IP of your VPS.
That’s all you need to start building with your agents while tweaking with Claude, Codex, or Composer 2. At least that’s my way of approaching things: use the Hermes Agent for creating skills, files, overall orchestration, and scripts, and use the extensions for editing and optimizing.

When your agents are grown enough, you can switch to Telegram, but in the preliminary phase, it’s better to have full control over the repository, skills, and code generated, and that’s why the IDE is necessary.
Oh, but we’ve done all this without even installing the Hermes Agent yet! Let’s see how in the next section.
Install Hermes on Your VPS
In this section, we are not going to go deep into the onboarding steps or the skills and tools. For that, read this article instead:

To install the Hermes Agent run this:
curl -fsSL https://hermes-agent.nousresearch.com/install.sh | bashYou can start the onboarding with this command: hermes setup. But it is not a requirement to continue the setup.
If you want to jump into the onboarding instead, the agent will ask for an LLM provider. My main choice is OpenRouter, because I can use hundreds of models, including video, image, and voice models.
If you don’t want multiple API keys on your agent (one to generate video, another for Speech-To-Text, and so on), it’s best to use an API that covers all use cases.
Nonetheless, the Nous Research team (Hermes Agent’s creators) has introduced a new subscription plan on their portal. Their plans are:
Free: Access to free models only and 0$ in credits.
Basic: $10/month, with $20 to spend in credits per month. Access to more than 300 models, and a hosted tool usage.
Plus: Same as basic for $20/month, with $20 to spend in credits per month.
Scale: Same as plus for $50/month, with $50 to spend in credits per month.
Max: Same as scale for $100/month, with $100 to spend in credits per month.
Choose the provider that best suits your needs, and finish the onboarding (or not).
Manage Profiles (Agents) & Projects
One of the things that most users want is to quickly connect their agents to Telegram or WhatsApp. While this is handy, it should not be the priority, especially if you’re still setting up your agents and workflows.
Ideally, you want to use the chat apps when your agents already have a certain level of maturity, to communicate with them, but not to implement robust configurations.
If you start making complex requests that go beyond following skill instructions or applying tools, the Telegram gateway may shut down, and you will lose access to your agents. That’s where you need to use Termius on your phone to restart the gateways (if you’re not on your laptop).
Create a Telegram bot for your agent
To create a /newbot using BotFather, follow these steps:
Open Telegram and search for BotFather.
Send
/newbot.Choose a display name (e.g., “Hermes Agent”).
Choose a username. This must be unique and end in
bot(e.g.,my_hermes_bot).BotFather replies with your API token.
That’s all for the bots, but to link them to profiles (agents), you still need to get your user ID, and the fastest way is to search for @userinfobot.
This is how its response should look:
@<my_username>
Id: <my_id>
First: Marco
Last: Rodrigues
Lang: en
Registered: Check Date

🧠 Explanations and answers
Free AI → DeepSeek (https://t.me/deepseek_gidbot) & ChatGPT (https://t.me/chatgpt_gidbot)
🖼 Visualize your ideas
Make Image → NanoBanana (https://t.me/nanobanana_gidbot)
Create a new Hermes profile
You can create a Telegram bot per agent (profile), and each one should have its own token. Here’s how you generate a new profile:
hermes profile create <new_agent>You can also just ask Hermes to create one. Once the new profile is generated, it has its own skills, memory, and configuration, just like a new Hermes instance.
If you want to monitor each profile’s token usage, you should create an OpenRouter key for each one of them, and it is also better to avoid having too many requests with your API.
The Telegram API and the User ID should be provided, so the profile is connected to Telegram. You can also change that directly in the .env file of your agent:
TELEGRAM_BOT_TOKEN=8769...
TELEGRAM_ALLOWED_USERS=89...
TELEGRAM_HOME_CHANNEL=89...
Create projects and manage them with your agents
One common question among people who are building with Hermes is: How do I organize my projects and my agents?
There’s no single answer to this. Some people will say to create folders inside the .hermes folder, while others will tell you otherwise.
My approach? Create a projects folder outside .hermes, and then sandbox the profiles to those folders.
If you have projects A, B, and C, and you want agent 1 to only have access to project A, you can tell your main bot this:
Hey, I want the agent
1to only have access to the folder of projectAinsideprojectsand it’s own profile folder.
If you apply this, the agent will be sandboxed and won’t have access to any information outside its own profile folder and the project A.
Of course, you can only give these instructions with your main bot, which has access to everything.
This way, you keep your projects detached from your Hermes instance and less prone to undesired changes. It’s also better for Git workflows and overall organization.
If setting up the Hermes Agent feels overwhelming, there’s no need to get frustrated. Let’s find a solution together.
Conclusion
In this tutorial, we didn’t focus on how to interact with the Hermes Agent, its skills, tools, configuration file, and so on. You can find more information about that in my other articles.
The goal was to provide you with a setup that keeps your agents safe, organized, and properly connected to both your smartphone and your computer.
We covered how Tailscale creates a private network that only you can access, protecting all your devices from external attacks.
Secondly, we saw how Termius can be useful when you need to restart Telegram gateways or make adjustments to your repository when you don’t have access to your computer.
Next, we saw how AI-powered IDEs are needed when building with AI agents, because they give you full control over the remote repository, and allow you to use Claude, Codex, or Cursor’s models to tweak the scripts generated by your agents.
Finally, we looked at how to install the framework properly, configure Telegram bots, create profiles, and associate them with projects the right way.
This setup was built after a lot of experimentation with the Hermes Agent, as well as by noting issues that clients shared with me during my trainings.
It may not be the only setup, but it is one worth implementing to ensure security, flexibility, and reliability.