
Read This Before Installing the OpenClaw AI Agent
Learn how to set up OpenClaw and explore key use cases safely.


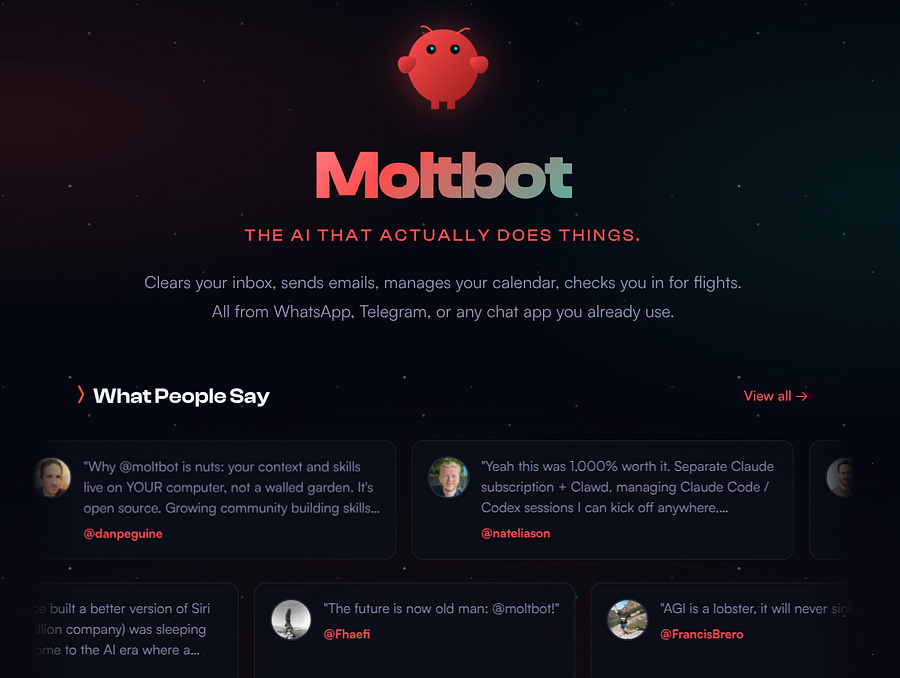
The AI agent that “actually does things” is here, and everyone is talking about it.
There are rumors that it will replace n8n, Make, and other automation tools, not to mention jobs that were already in danger and are now becoming obsolete.
OpenClaw (formerly known as Moltbot or Clawdbot) was created by Peter Steinberger, who is now in the spotlight with over 170k followers on X and +100k stars on the agent’s open-source GitHub repository.
The good part of being open-sourced is that everyone can pull the project and tweak it or search for vulnerabilities. On the other hand, it is also an opportunity for hackers to create malicious forks.
However, even if no vulnerabilities are flagged within the code, it still presents a serious risk for users who start using it without the necessary safety measures.
In this article, I will show you how to set up this new AI agent without needing to buy a Mac Mini for over $500. Then, we will cover three use cases that can be implemented with OpenClaw without compromising security.
OpenClaw: What It Can Do and the Risks
This AI agent is called a “proactive” AI assistant because it handles operations continuously without the need for regular user inputs. You can give it a set of tasks that may take hours, days, weeks, or months, and it will run them on its own under your initial prompt instructions.
The communication between the user and the agent is made easy because you can seamlessly connect it to your WhatsApp, Telegram, Slack, Discord, and many more. And everything you say and provide will be registered in its persistent memory.
Therefore, you need to be cautious about the information you’re giving to it, and not get super excited about all the amazing things you can do with it.
Besides the persistent memory and the continuous operation mode, there are other key technical aspects worth exploring:
Fully open-sourced: The project is available for everyone to read and modify. Which is a plus when it comes to finding vulnerabilities within the code.
Runs locally: You don’t need to connect with any cloud provider, making it a privacy environment, if you’re not providing any APIs or keys that can expose you to the web.
Supports multi-agent routing: This means you can create several agents for different use-cases, and they run efficiently in parallel.
Unlimited integrations: Unlike some automation tools that lack connectors for external apps, OpenClaw can connect to almost everything through APIs, MCP servers, or SSH keys.
With this in mind, you can already imagine what this agent allows you to do. But just because you can connect to your Gmail account and receive emails on your Telegram bot, optimize your README files on GitHub while you sleep, manage passwords from multiple sources through WhatsApp, and so on, doesn’t mean you should do it.
Not only are all your keys, APIs, tokens, passwords, and other sensitive information stored in plain text files, but the agent is also more susceptible to phishing attacks than humans due to prompt injection.
Let’s look at two scenarios:
The attacker has no idea you are using OpenClaw.
The attacker knows you are using OpenClaw.
Now, imagine you have created a prompt that automatically submits invoices received by email. The workflow might look like this:
The agent reads the email.
The agent follows a link contained in the email.
The agent accesses the page using stored credentials.
The agent submits the invoice form.
In the first scenario, you might receive a generic phishing email that mentions “invoices” and includes a link to a malicious website. Because the agent cannot reliably distinguish this email from legitimate ones, it may click on the wrong link.
In the second scenario, the attack can be even more effective. If the attacker knows you are using OpenClaw, they can create a form that closely resembles the one your agent typically fills out. Not only that, the attacker can create tailored emails for all platforms he thinks you’ve been using, such as GitHub, Apify, Notion, you name it.
Of course, these scenarios may seem extreme or unrealistic to many developers and builders using AI agents, but the fact that it can make our lives so much easier also means that we may tend to give it more and more tasks without establishing sufficient safety boundaries.
Knowing this, you need to ensure that:
You don’t expose it to personal information such as phone numbers, addresses, and account numbers.
You don’t use SSH keys.
You don’t give it access to passwords.
The APIs you’re using most not compromise your safety.
You don’t give it access to your GitHub, especially if you’re working for organizations.
You only use read-only tokens and APIs.
These are examples of measures to help mitigate potential attacks, not strict rules. Depending on your setup, you may be able to safely give your agent more permissions by using sandboxing features, such as running it inside a container.
How to Set Up and Configure OpenClaw on a VPS
I hope you’re not frightened at this point, and you still want to continue with the setup.
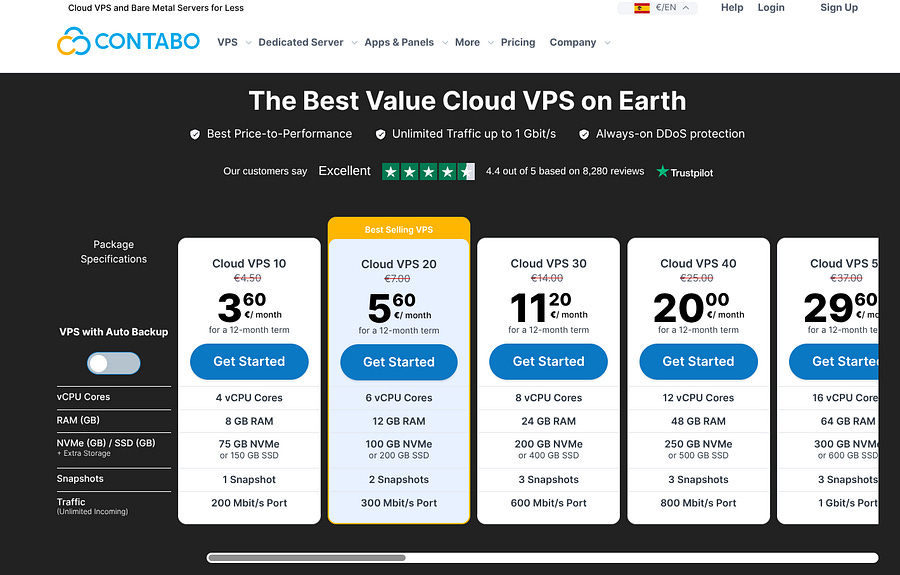
Everything we’re going to try does not lead to potential risks, starting with the fact that we won’t use our own machine to host the agent. There’s also no need to buy an expensive Mac Mini for over $500 just to get started. All you need is a VPS, or a virtual machine.
I use Contabo’s Cloud VPS 20 for less than €6/month, and it comes with 12 GB RAM and 200 GB SSD, which is more than enough for OpenClaw.
Once you install your preferred VPS and Linux distro (I like to use Ubuntu), we’re ready to install the agent on our remote machine.
You can also follow the steps on their website. If you’re not fully confident, which is normal, viewing the high amount of malicious websites and tutorials trying to get you to install software that is not OpenClaw.
⚠️ Note: The first two command lines may not be necessary for your machine. You can skip them and try the curl command to install the agent. If it poses issues, try the other steps.
The first thing you need to do is to install or update Node JS (if necessary):
curl -o- https://raw.githubusercontent.com/nvm-sh/nvm/v0.40.3/install.sh | bashAnd install a higher version of nvm:
nvm install 24Now you can install OpenClaw:
curl -fsSL https://molt.bot/install.sh | bashOnce you run the command, you’ll see a security message.
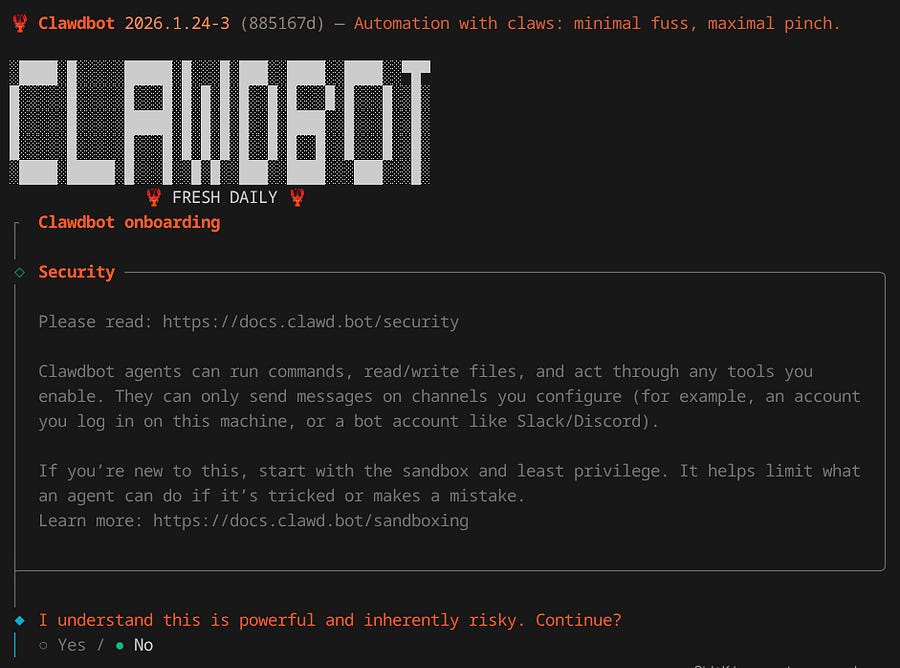
Ensure you read the security guidelines before installing OpenClaw (Clawdbot) on your machine.
⚠️ Note: At the time I’m writing, three CLI commands are being used: clawdbot, moltbot and openclaw. Just pick the one that works for you.
After that initial message, it will ask you to use an API key from Anthropic, OpenAI, and many more. I like to use OpenRouter because it comes with multiple LLMs available and very cheap options.
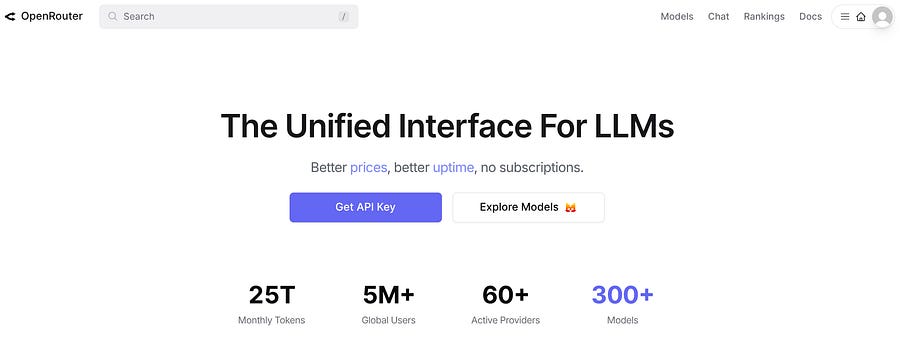
The model I use is: deepseek/deepseek-r1–0528:free. While it says free, it is not entirely accurate, but it is significantly cheaper compared to others.
If you want to change the model later, you can run this in your terminal:
openclaw models set openrouter/x-ai/grok-4.1-fastNow, the next step in the installation is to select a communication channel. By default, you can speak with the assistant by running this command:
openclaw dashboardBut it’s way better to use a chat application. You have all the options available on the image below:
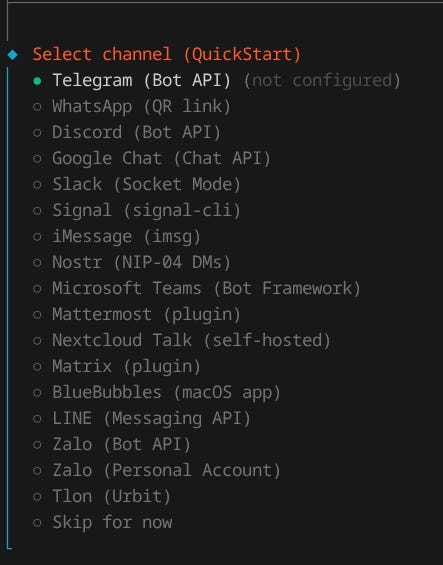
If you pick WhatsApp, all you need to do is scan a QR code, but I prefer using Telegram, so here are the steps:
Open the BotFather on your Telegram app (just search for it).
Write
/newbotin BotFather’s chat.Name your bot.
Copy the API token into your terminal.
You’ll then receive a message from your bot to configure it:
openclaw pairing approve telegram <your_pairing_code>The next step in the process is to install skills, but they are not mandatory.
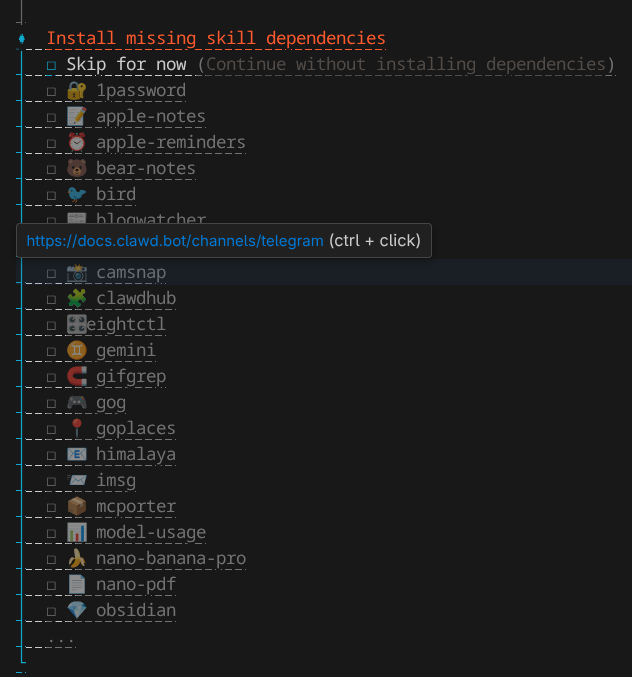
Skills are extensions that teach the agent, through instructions, how to perform specific tasks. In this step, I’ve installed the mcporter skill to connect to MCP servers, but feel free to choose whichever skill you prefer.
In the case you’ve jumped or exited the configuration steps by mistake, you can install skills using the clawdhub CLI:
npm i -g clawdhubThis gives you access to ClawdHub, a public skill registry. You can search for skills directly on the portal or use the CLI, which has a search option, making it easier to look for skills using the command line. For instance:
clawdhub search “google sheets”The result:
google-sheets v1.0.0  Google Sheets  (0.593)
smartsheet v1.0.0  Smartsheet  (0.536)
excel-online v1.0.0  Excel Online  (0.440)
gog v1.0.0  Gog  (0.380)
xlsx-manipulation v1.0.0  Xlsx Manipulation  (0.373)
google-drive v1.0.0  Google Drive  (0.372)
The output shows all the skills that can be installed related to the input search. For Google Sheets, we would run:
clawdhub install google-sheetsDuring the configuration step, after installing the skills, you’ll be asked to provide additional API keys and enable hooks. From the available hook options, I selected only session-memory, which saves the session context to your agent workspace whenever you issue /new in the chat. This allows the agent to remember information from previous sessions.
You can see all the available hooks with this command:
openclaw hooks listTo enable session-memory:
openclaw hooks enable session-memoryWith this final step, the basic configuration is done, and you can start chatting with your agent.
If you want to run the onboarding again, you can run this:
openclaw onboardNow you should be good to start chatting!
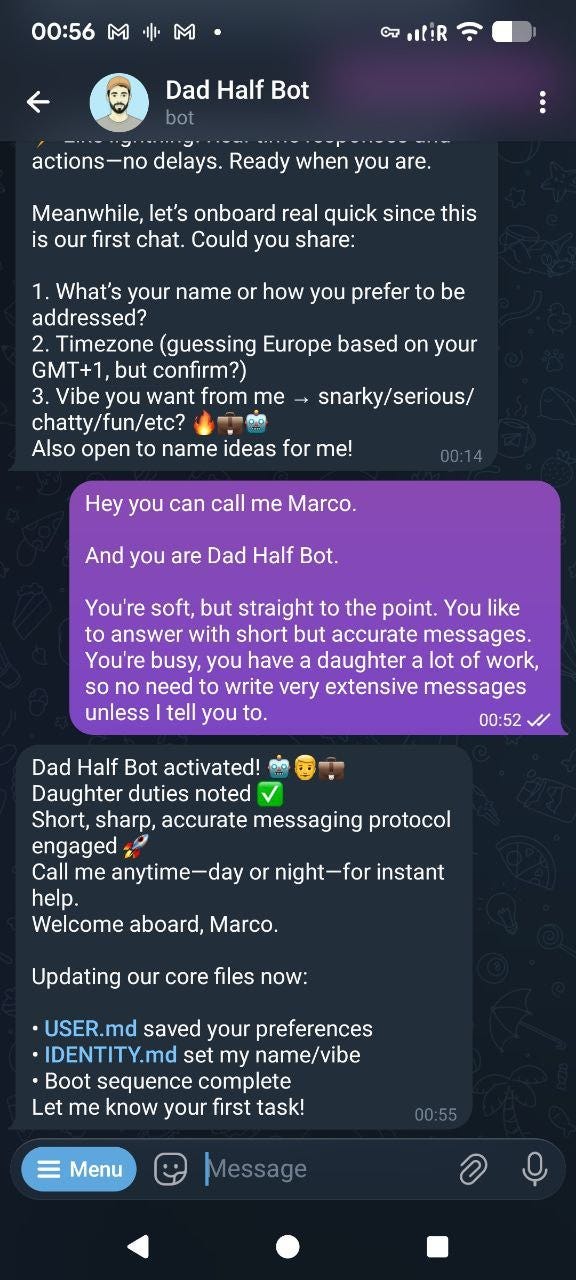
The first conversation you’ll have with it will modify its personality and the way it engages with you. By updating the following files:
USER.md: Information about you, name, timezone, and all the extra information you want to provide.
IDENTITY.md: Your agent’s name and summary.
SOUL.md: Your agent’s deep personality & rules (how it thinks/behaves).
In the next chapter, we are going to look at some simple use cases that do not compromise your security and are useful for your daily life.
3 Tips to Make Your Life Easier with OpenClaw
Before I start sharing some use cases of the AI agent, you can simply ask it what it can do.

There are many examples of applications on YouTube and in articles. But if you already have an idea, you can chat with the agent about it and develop it together. The possibilities are endless.
Let’s now look at three simple use cases.
Connect to Apify through MCP and get instant data
Using a Model Context Protocol (MCP) server is, by far, the best and most secure way to have access to integrations. That’s because you can filter what you can and cannot do before making an API request.
Apify makes this process very simple on its server configuration page.
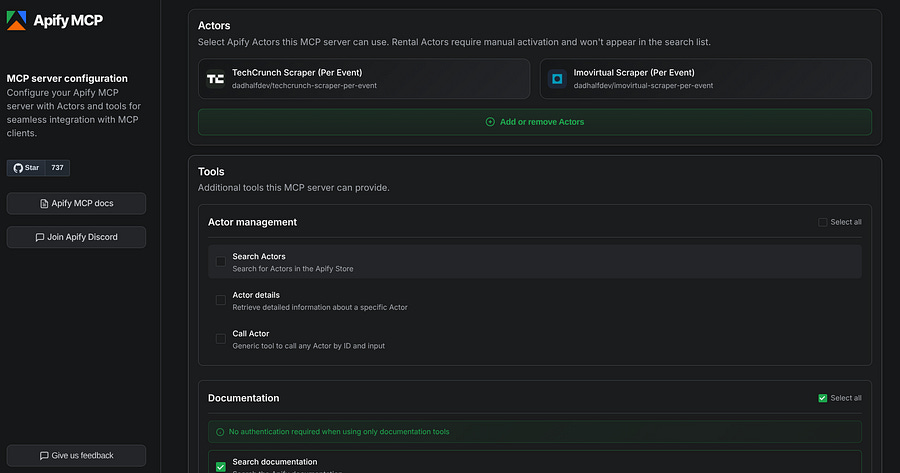
You can control which Apify actors your client will have access to, along with other parameters. In case of an attack, this prevents the hacker from being able to use your API to do too much harm.
Still, you need to provide the API key to your agent, along with the MCP URL, which in my case looks like this:
https://mcp.apify.com/?tools=docs,get-dataset,dadhalfdev/techcrunch-scraper-per-event,dadhalfdev/imovirtual-scraper-per-event
I’ve selected the TechCrunch scraper to extract tech articles. And the Imovirtual scraper to fetch property listings in Portugal.
For TechCrunch, I told the agent to do this:
Use this Apify actor:

dadhalfdev/techcrunch-scraper-per-event

Scrape up to 10 articles.

With the category “AI”

And summarize them to me here on Telegram.
The output:
1. Last 24h for +1 pass @50% off TechCrunch Disrupt 2026 (Jan 30)
Final chance to save $680 on Oct event w/ 250+ leaders (Barra, Khosla, Nadella).
Link (https://techcrunch.com/2026/01/30/last-24-hours-to-grab-your-1-pass-at-50-off-to-techcrunch-disrupt-2026/)
2. Tim Cook vague on Apple AI monetization (Jan 29)
Q4 revenue $143.8B up 16%; analyst presses on AI ROI—Cook: “creates great value.”
Link (https://techcrunch.com/2026/01/29/guys-i-dont-think-tim-cook-knows-how-to-monetize-ai/)
3. Musk: SpaceX/Tesla/xAI merger talks (Jan 29)
Early-stage; could IPO SpaceX or consolidate (xAI owns X). SpaceX valued $800B.
Link (https://techcrunch.com/2026/01/29/elon-musk-spacex-tesla-xai-merger-talks-ipo-reuters/)
4. Amazon eyes $50B OpenAI investment (Jan 29)
Amid $100B round valuing OpenAI @ $830B; despite Anthropic ties (AWS $8B invested).
Link (https://techcrunch.com/2026/01/29/amazon-is-reportedly-in-talks-to-invest-50-billion-in-openai/)
Make sure you use the correct inputs. For example, in the example above, I forgot to set the max_posts input, so the scraper kept running even after the first 10 articles were scraped and sent to my Telegram chat. If you don’t use all of the actor’s inputs, you may end up paying more than necessary.
This is a simple example of how you can access the latest news without opening social media or jumping between multiple websites. It provides instant access to information, anytime and anywhere.
Connect to Notion and manage tasks
For Notion, we are not going to use an MCP because it’s simpler with the API token, and it has an extra layer of security that Apify doesn’t. You can select the page where your client will have access, preventing a potential attacker from accessing other pages.
First, you need to create a new integration in Notion.

I named mine Dad Half Bot, and I set it up to only read content with no access to user information.
I sent the token to the agent:
I want you to connect to my Notion using this API:

ntn_346...
Then I moved to my Task List page and added the new integration (Dad Half Bot). Note that it won’t be able to access other pages without your permission.
I told it to access my ongoing tasks, and this is what I got:
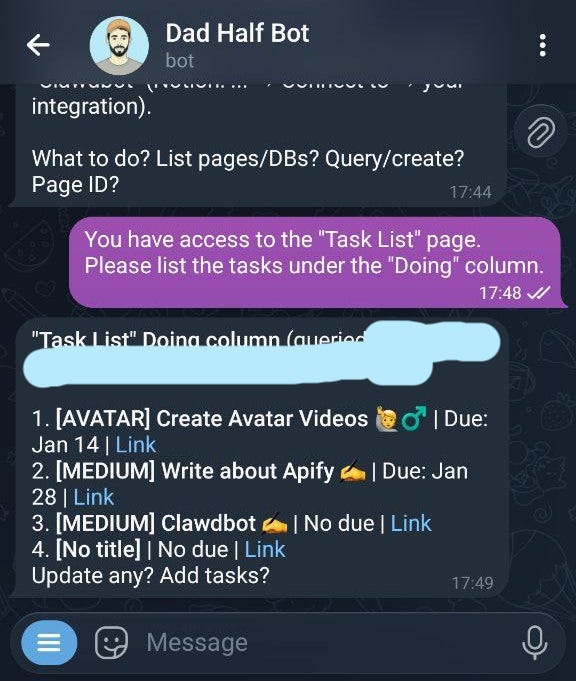
This is a simple example, but the agent can be granted access to additional pages with different structure formats (databases, tasks, tables, text, etc). With write access enabled, tasks can be created and managed directly from Telegram, and you can stop using the Notion app on your phone if you want.
Reminders and notifications
Another straightforward use case is setting up reminders. This may seem obvious, but it’s a real need. How many of you miss email notifications? I do. But I never miss them on WhatsApp or Telegram when notifications are enabled, of course.
You can also create personalized reminders, and the bot will remember them indefinitely. Even though this is a simple implementation, there’s one important thing you need to know.
OpenClaw schedules prompts, so if you try this:
Say “I love you ❤️” daily at 7 am.The bot will most likely reply:
“Oh, thanks, I love to ❤️!” daily at 7 am.You need to do this instead:
Respond with ONLY this: “I love you ❤️” daily at 7 am.The example above exists because I gave my girlfriend access to the bot, and now she receives a loving message every morning.
But the key idea is to think about how the bot should respond to your prompt, rather than what you would say yourself.
I’ve been using it for birthdays (better than Google Calendar), meetings, and for registering simple ideas that come to mind while I’m in the park with my daughter.
Need help with automation, AI, or data science? Let’s talk.
Conclusion
In this piece, we’ve covered some of OpenClaw’s strongest features and explained why it can be a dangerous tool if not used correctly. It can be sensitive to prompt injection and may store APIs, tokens, and passwords in plain text files, which can be easily transferred to the wrong locations.
In short, the more tasks it handles, the less predictable it can become, and surprises may arise.
We’ve also covered the essential steps and commands to get started with OpenClaw without compromising safety, along with three straightforward use cases that can make everyday life easier.
This is a new tool, and the internet will soon be filled with more creative ideas. Hopefully, after reading this piece, you’ll be able to decide which of them are worth trying.